
Fall Leaf Nail Designs
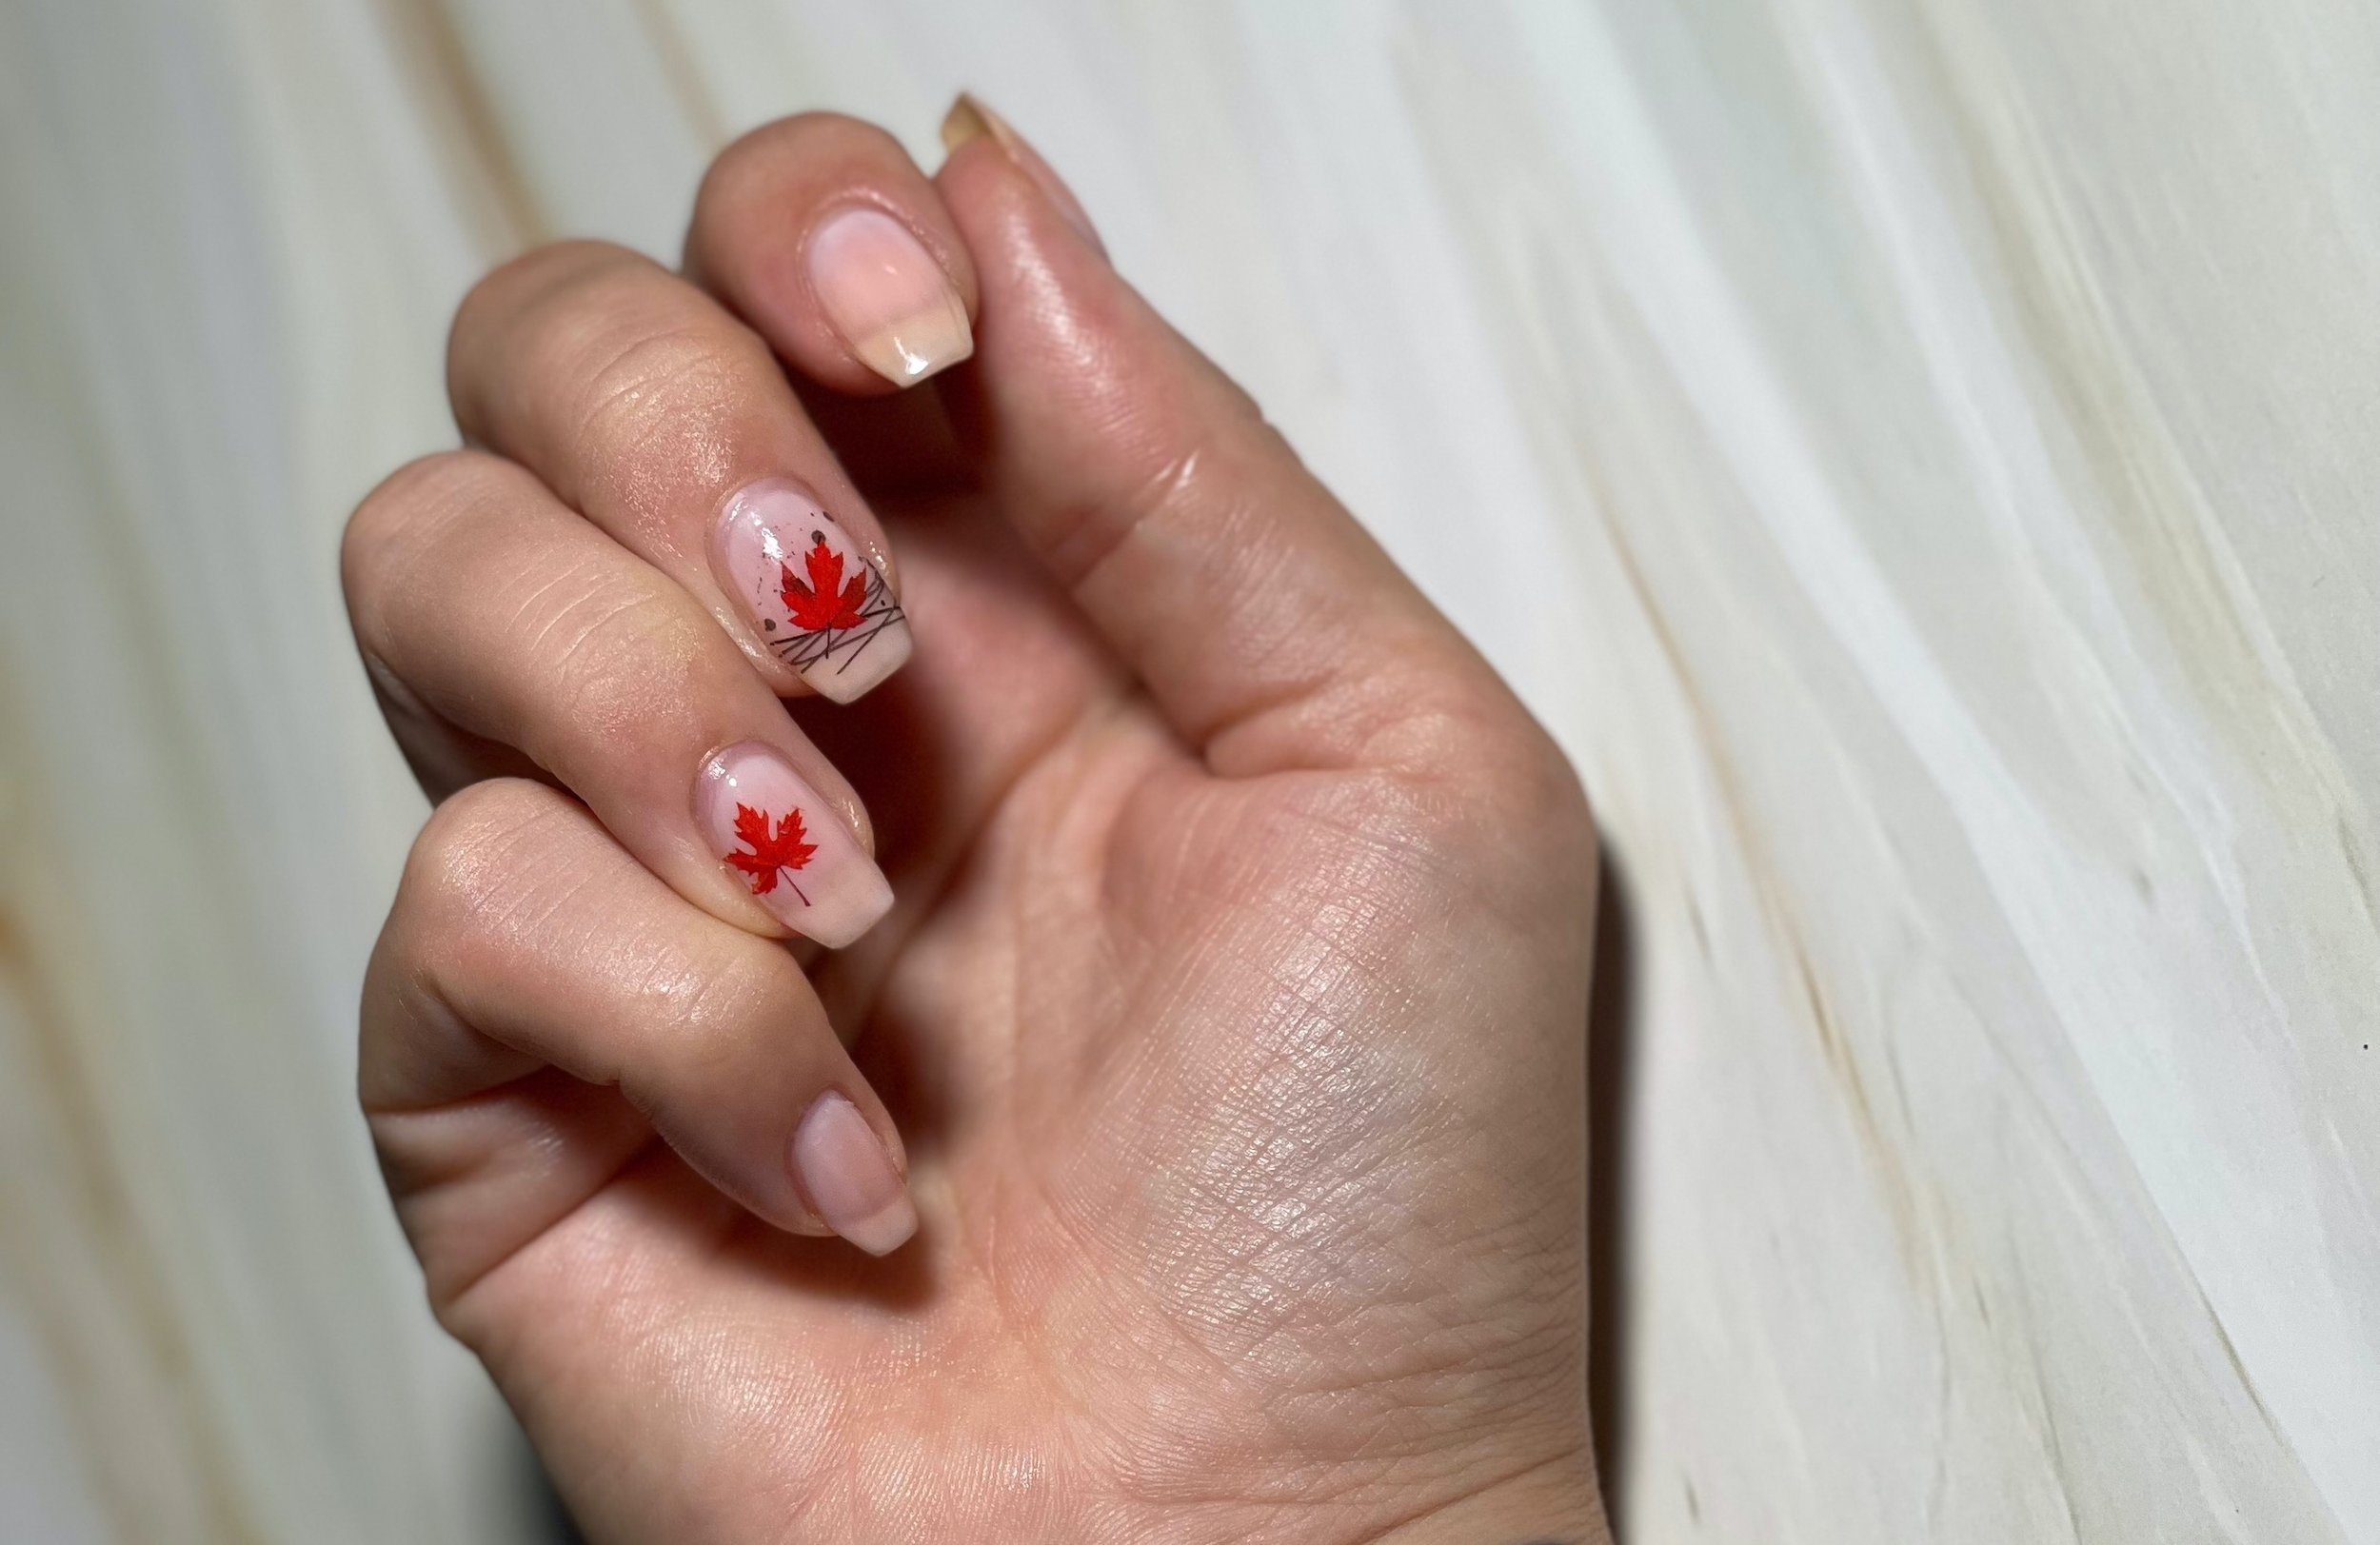
Fall nails - red fall maple leaves nail design using water transfer nail decals on tan marble background
This page contains affiliate links and this site earns from qualifying purchases made through these sponsored links.
In this post we are going to show you how to get gorgeous fall leaf nails using water transfer decals and a sheer pink nail polish.
If you are new to water transfer decals, they are a pattern or image, large or small, printed on a special paper. They work like a temporary tattoo in how you apply them and they are very easy to use.
Decals lay flat to your nail as they form to the nail as they dry.
Materials needed for this nail design project:
Gather these materials, and let’s go to the next step.
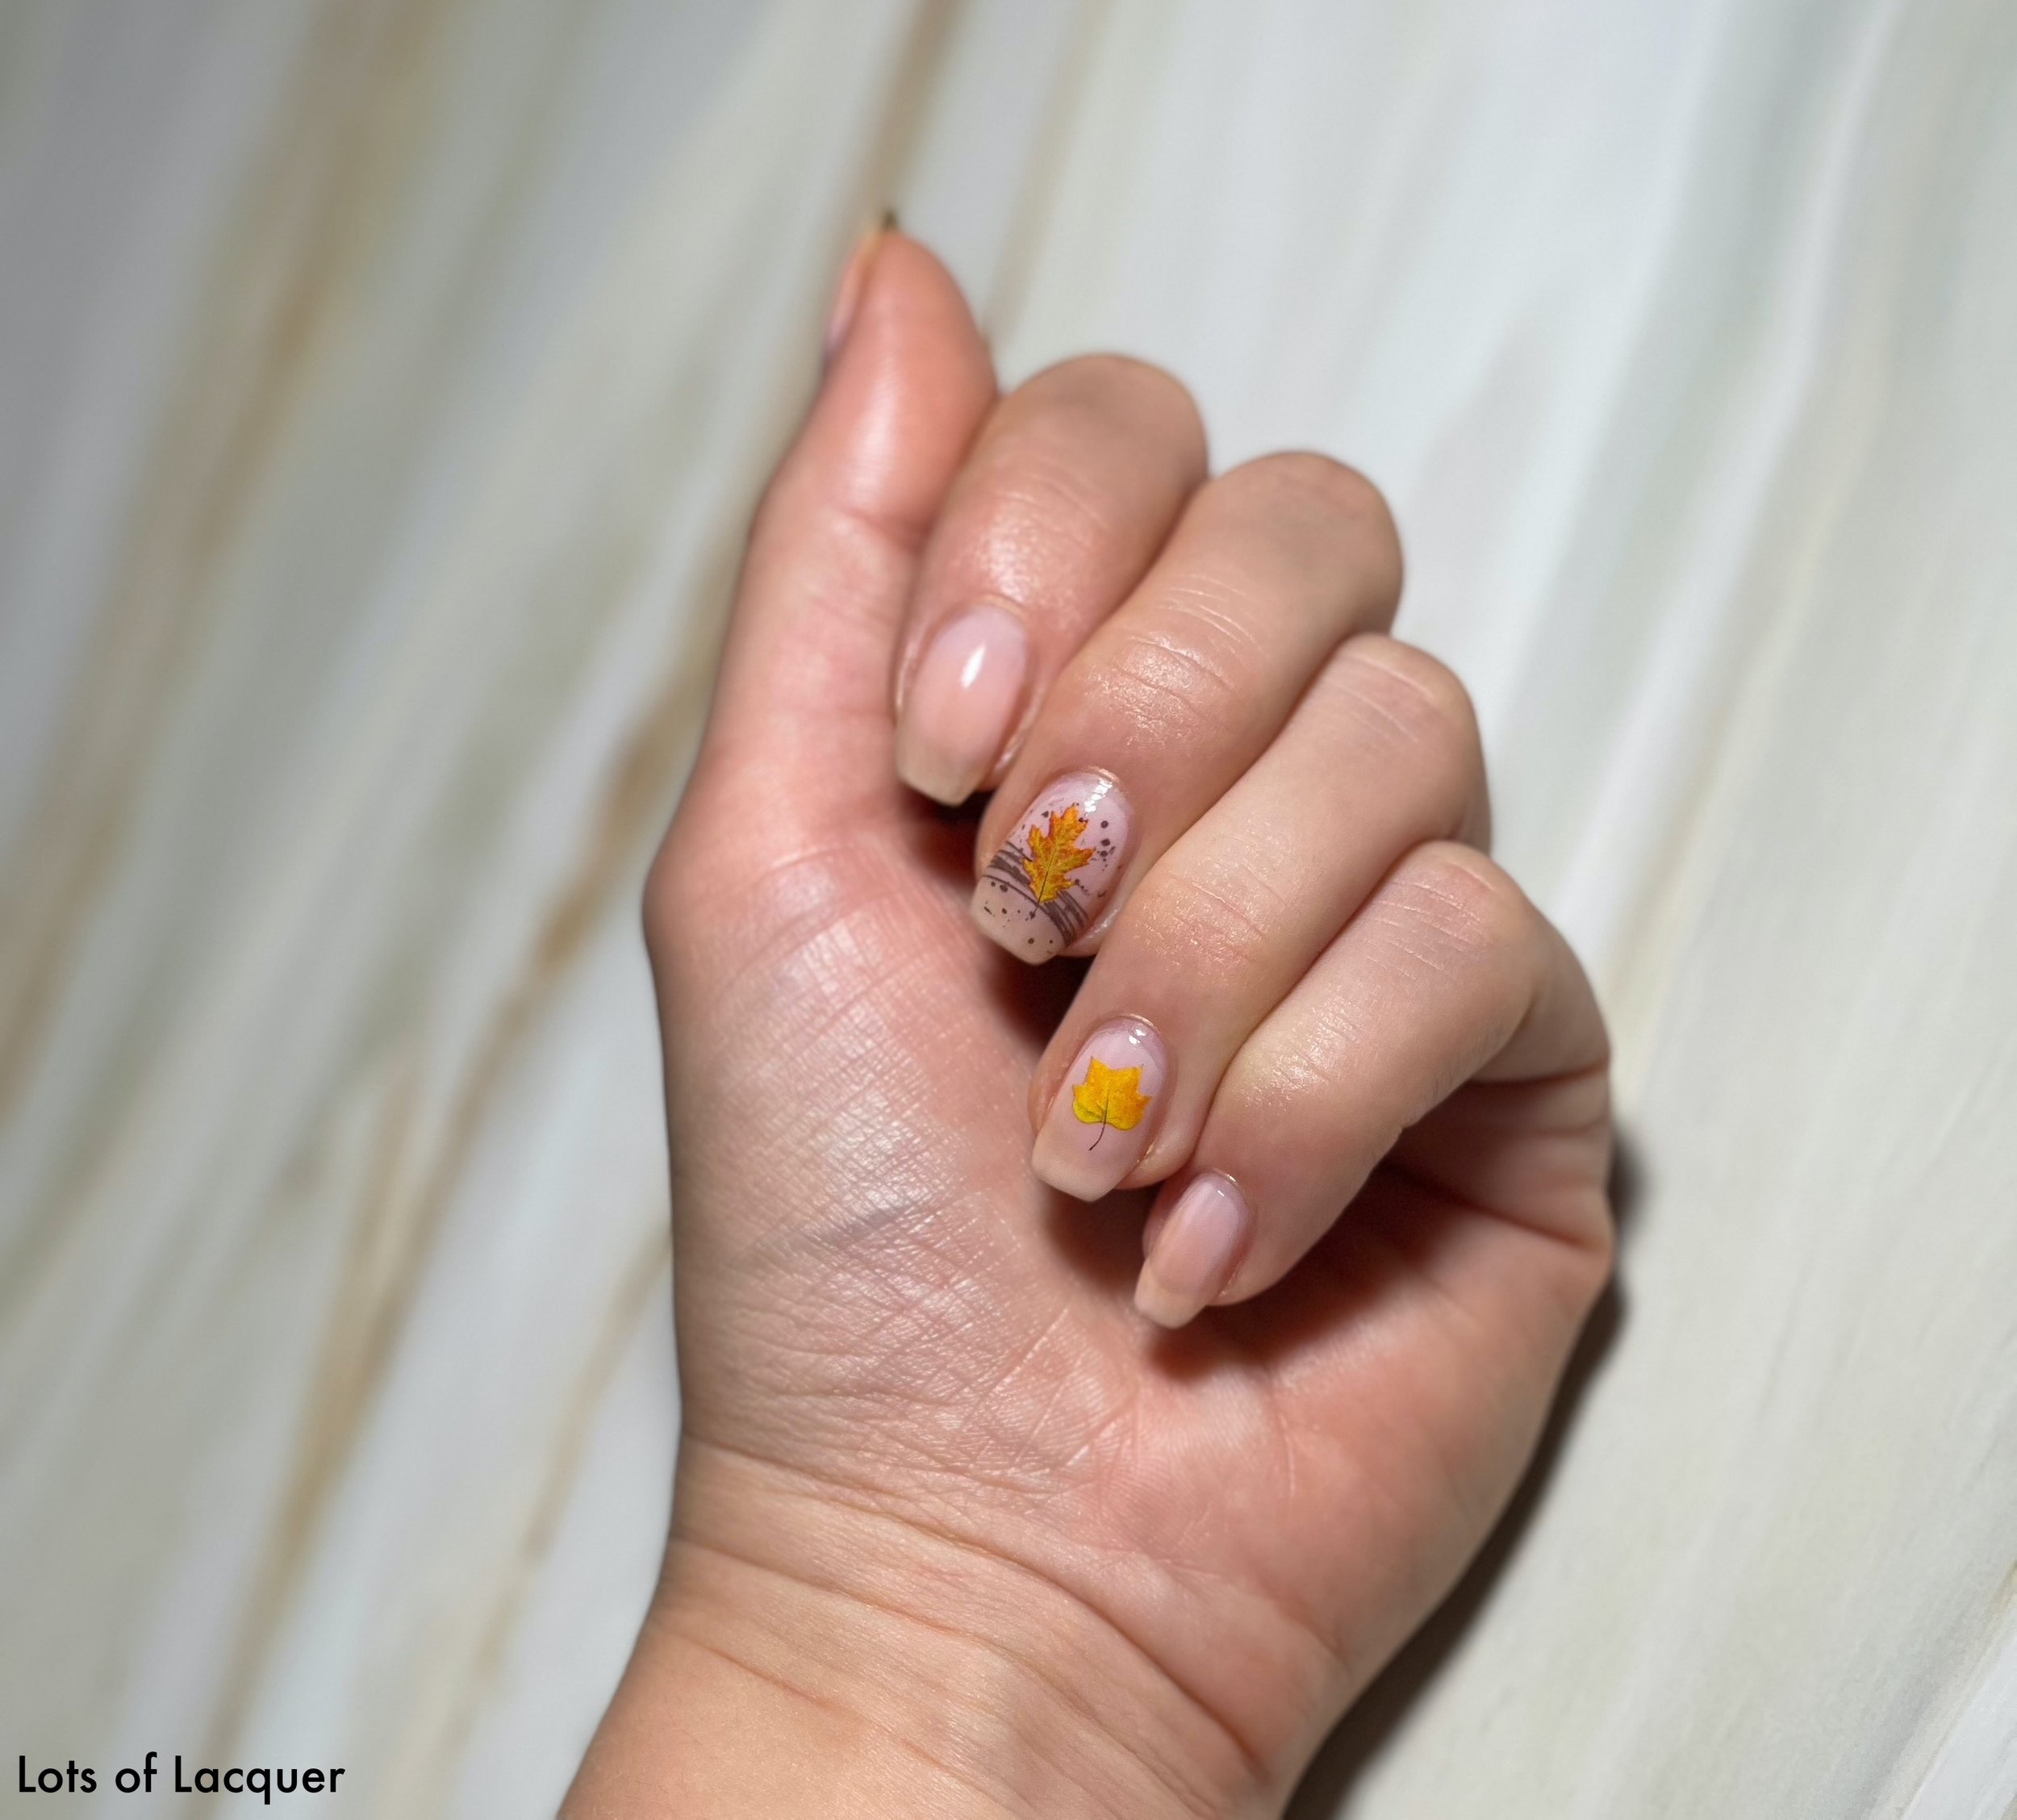
Fall nails - golden fall leaves nail design using water transfer nail decals on tan marble background
To use water transfer decals:
Select the designs you want on your nails, cut the designs singly, removing as much white space as possible from around the edges. Remove the plastic film (if there is one) over top, leaving the paper backing and the decal.
In this post, pictured are two decals per hand, one per nail. Consider using 2-5 decals as accents per hand. You can jazz it up or down with fewer or more decals at your discretion; this is the creative part.
Grab all your cut decals, your small bowl of water, your hand towel, and set them on your nail station for when you’re ready to apply the transfers.
Apply your base coat and let it dry.
Apply two coats of color and let them dry.
When your final color coat is dry, but before you apply the top coat, it’s time to dip your water transfer decals in the bowl of water. Dip them one at a time as you get ready to apply each one.
Wait 30 seconds to 1 minute until the paper is soft.
Work with one decal at a time to avoid over soaking them - they can separate from the paper backing before you get to them, and float to the bottom of your bowl. You want to avoid this because sometimes they then stick to the bowl’s bottom, and you have to empty the water to remove it. It’s a hassle.
While you wait, get your hand towel and make sure it is next to the bowl of water.
After the time has passed, and your decals are ready, remove the decal paper from the water with the decal still attached to it.
Place the backside of the decal, with the top of the decal facing your skin, on your thumb.
Slide your thumb down the paper sheet, removing the decal with it. Allow the wet paper to drop down on your hand towel and absorb the moisture.
Using your thumb with the decal now on it, now quickly roll the decal over the top of the nail you want the decal on.
You can also use tweezers to remove and place the decals instead of your thumb, but make sure to slide them off exactly horizontally, or they can fold over on themselves.
When applying with tweezers, hover the top of the decal over the top most part of the nail where you want the design, and slowly touch it to the nail, until the entire decal is laying on the nail.
The decal should release easily if wet enough.
Working swiftly and gently arrange it on your nail at the angle you want using your fingers, and smooth the edges of the decal around the curves of your nail.
If your decal doesn’t release, place it back in the water for another 30 seconds and try again. If still no luck, try using tweezers to remove it from the backing. If all else, cut out your next favored decal, and use that. Some decals don’t separate from the backing properly, it’s rare but it can happen.
Apply all the decals you have in the same way as above until you are satisfied.
If there is any excess decal that goes beyond the nail bed, use an acetone dipped bush to remove it.
Allow the decals a few minutes each to set, and apply your top coat.
Using this process, here is your finished product:

Fall maple leaves nail design using essie mademoiselle and water transfers on tan marble background
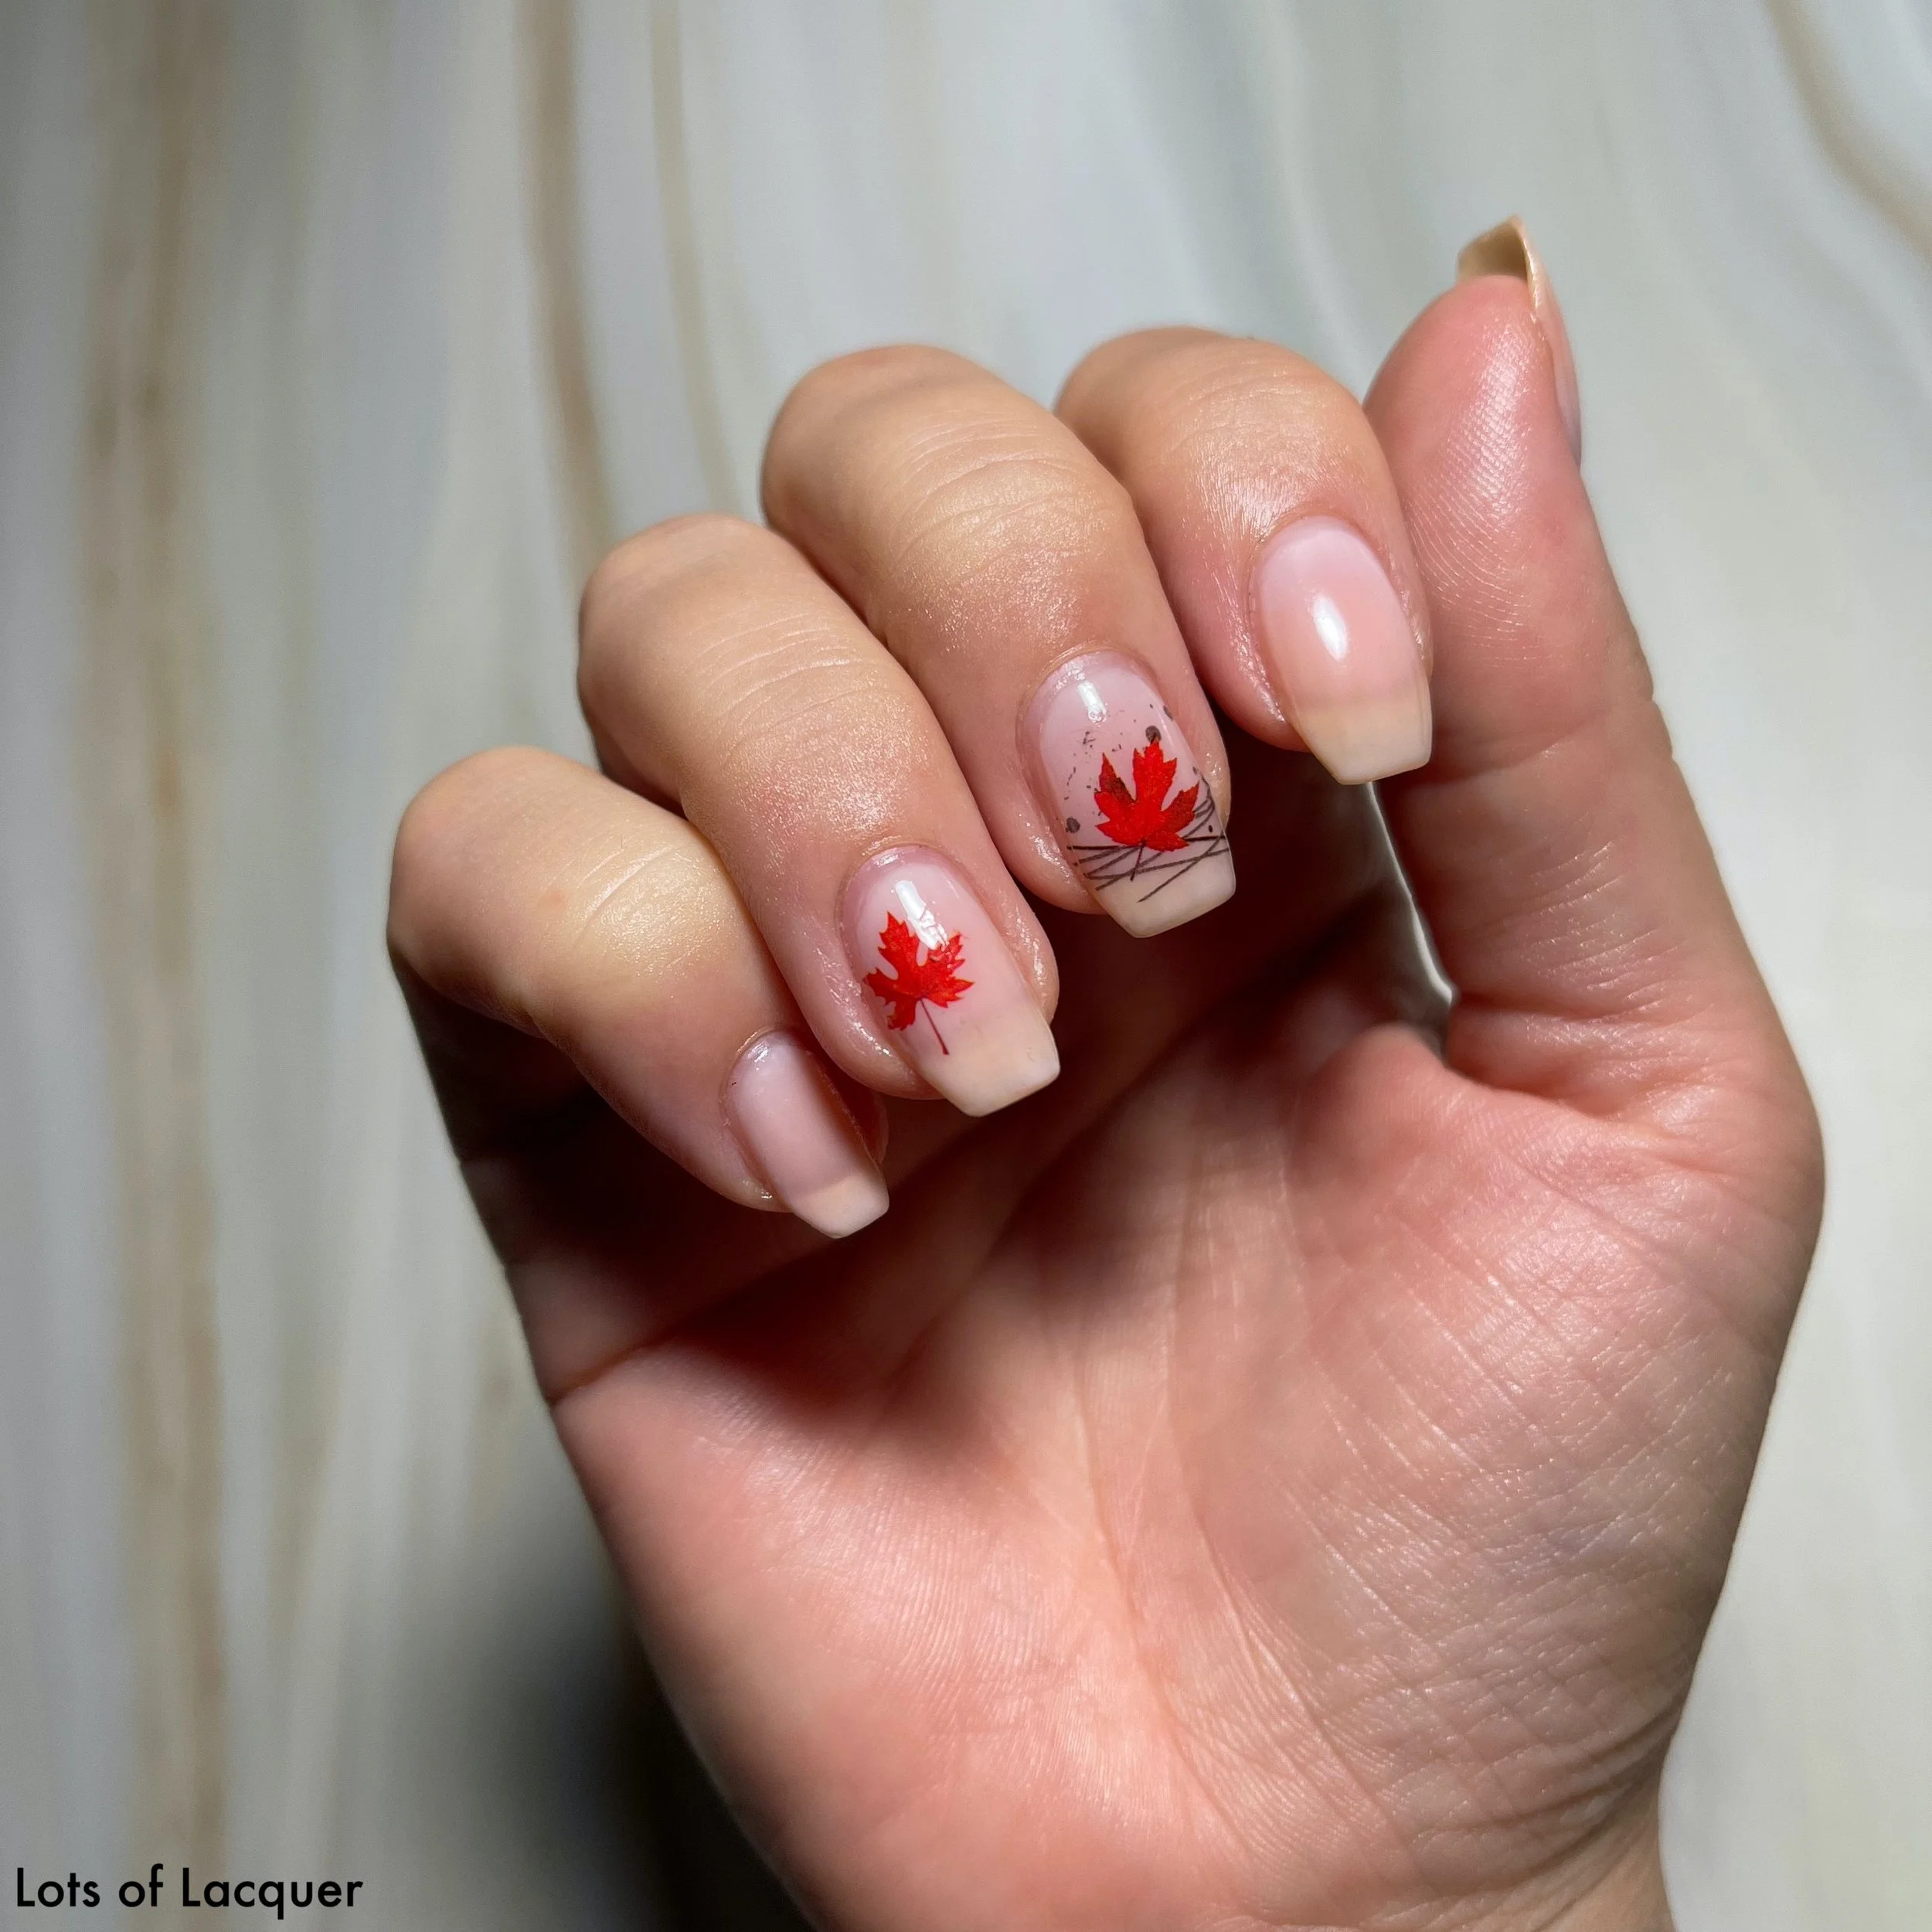
Red maple leaves fall nail design using water transfers on tan marble background

Golden leaves fall nail design idea using water transfer nail decals on tan marble background
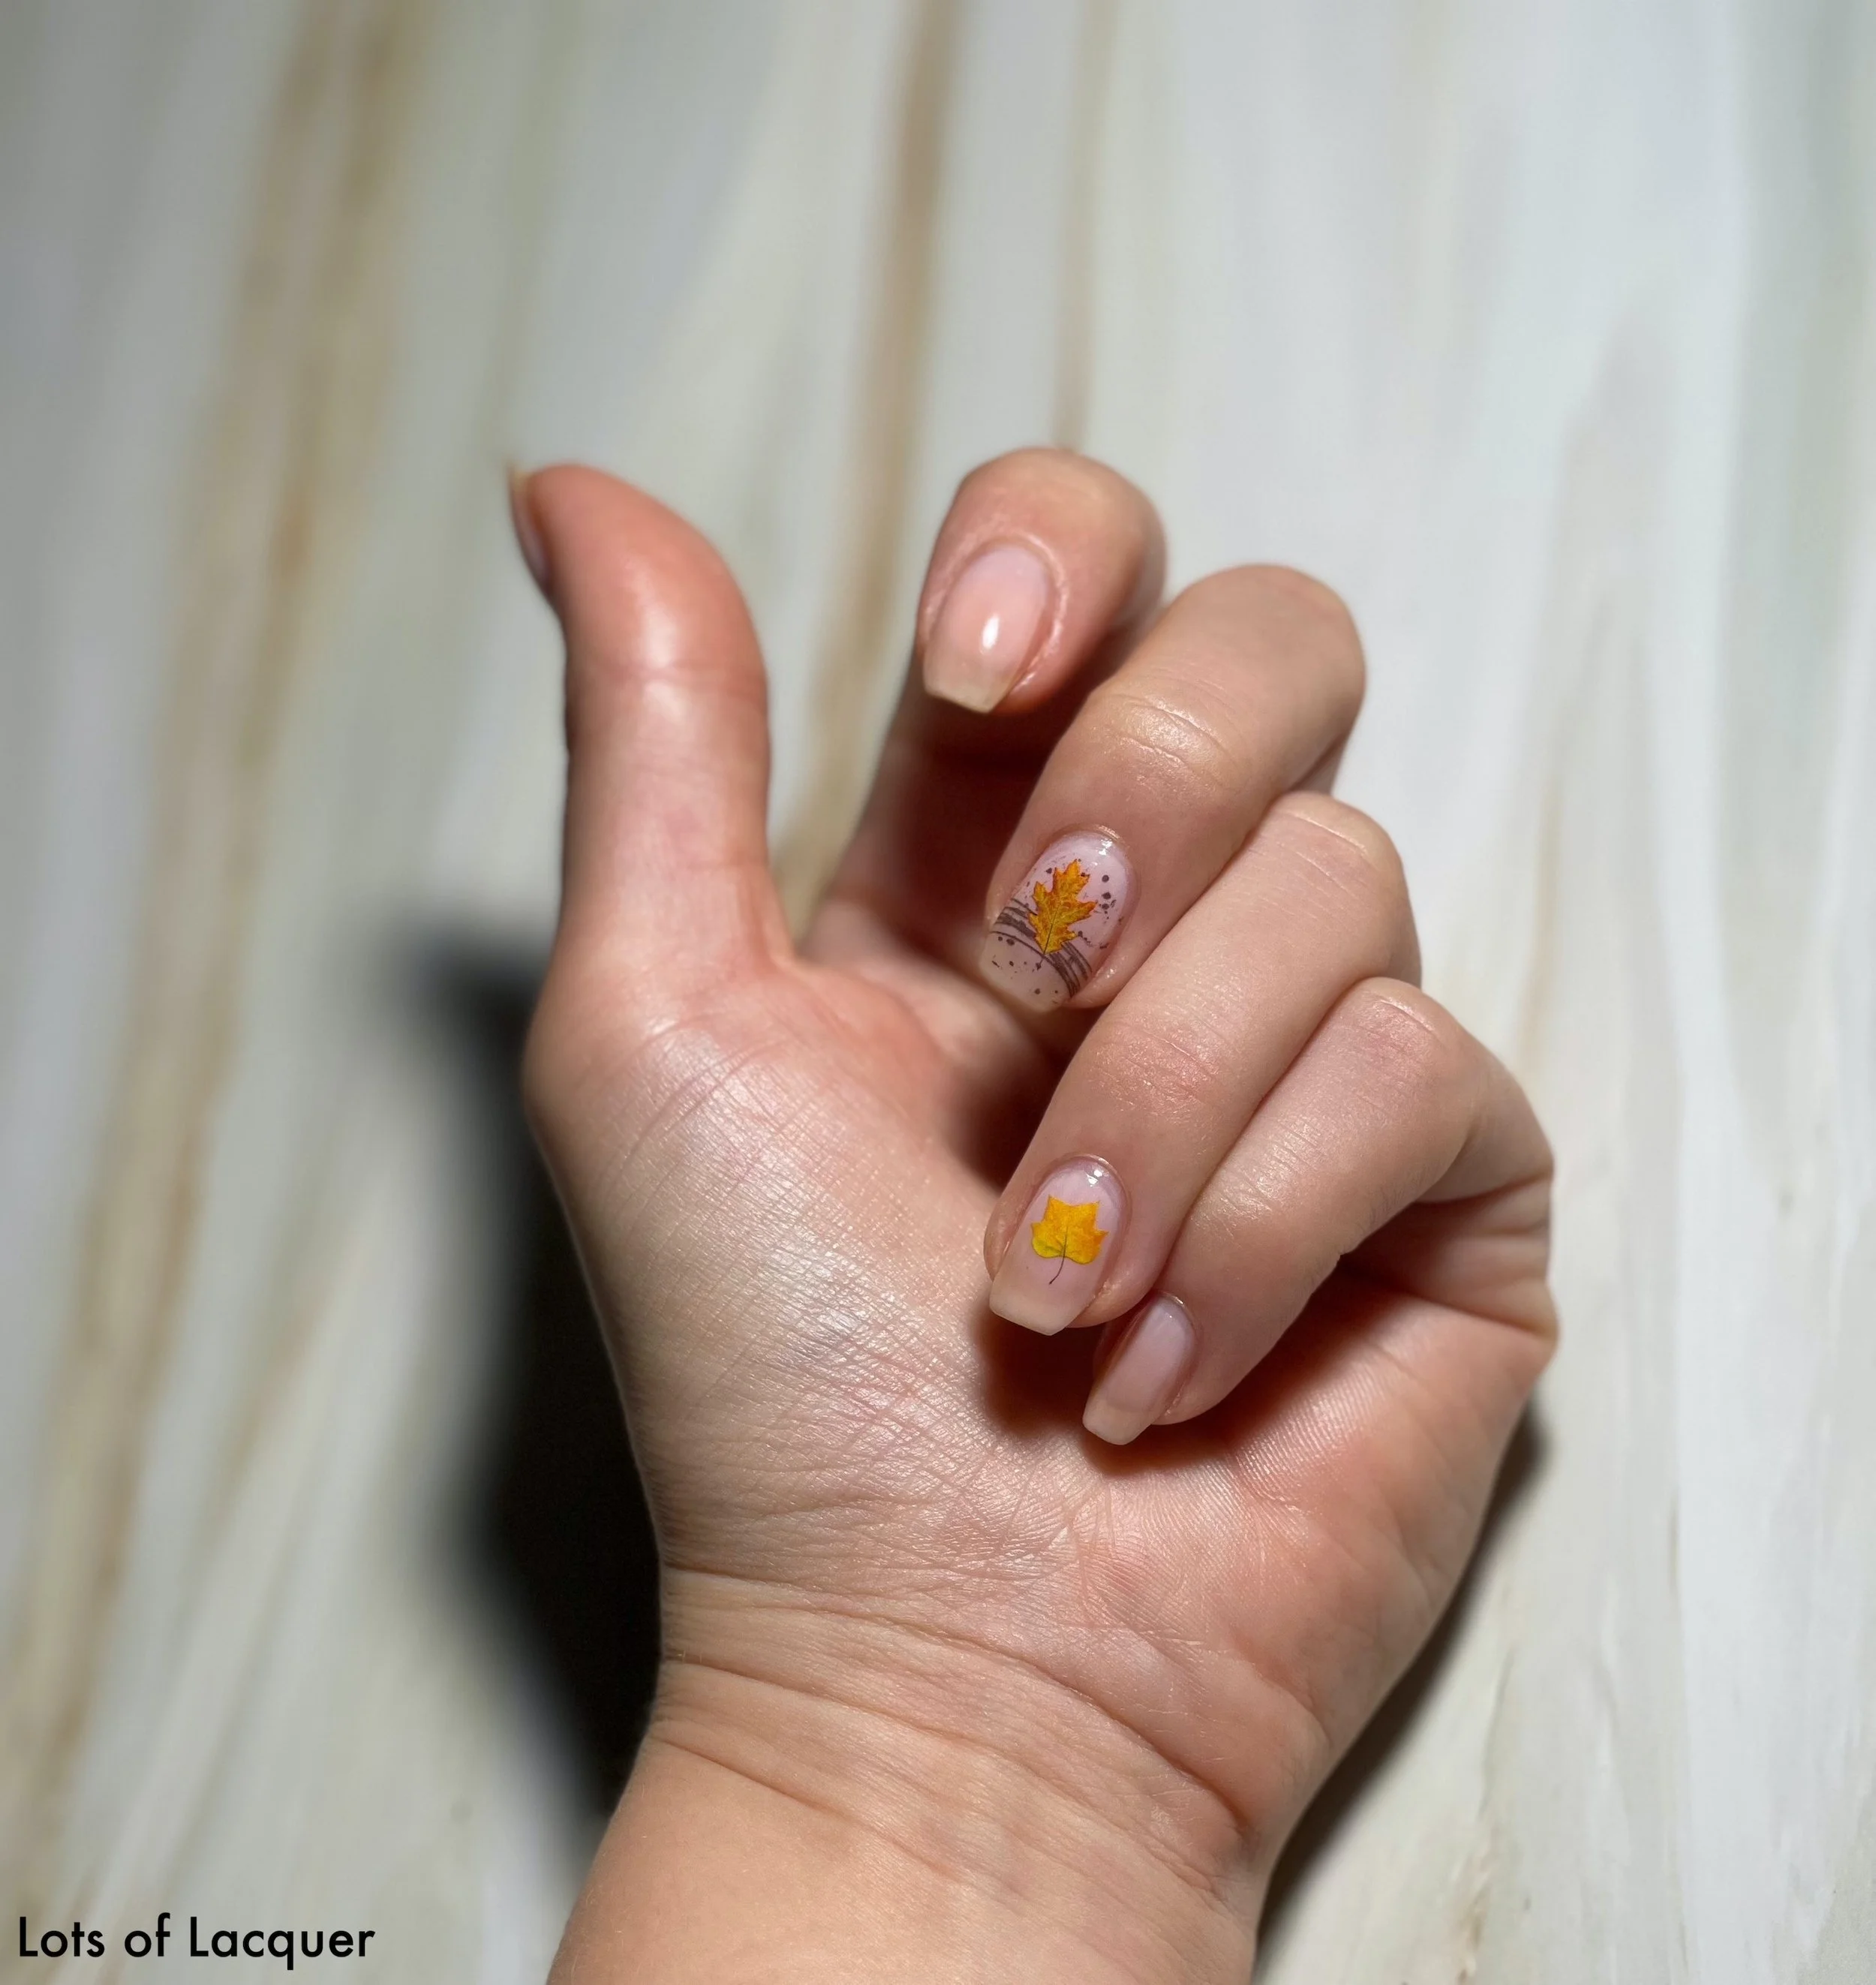
Golden fall leaves nail design using water transfer nail decals on tan marble background
In this autumnal leaf design, two golden leaves were applied to one hand and two red leaves were applied to the other.
You can intermix the shades as you like for your design, or stick with this - it's up to you.
Decal placement is a creative endeavor. Have fun with it.
If this is your first time using water transfers, your first time using this set or your first time today - you may lose your first few decals. It happens.
It can take a time to get to know the pliability of each brand’s water transfers and to get used to how much time each needs to submerge in the water before they are ready.
Read the instructions with your decals for the exact time they need to be soaked before they are ready to apply - the above time is just an estimate - to avoid losing decals by being taken out too early and not releasing properly, or for sitting in the water too long and sticking to the bottom of the bowl.
Now that the caveat is out of the way, sit back and enjoy your nails.
Once your top coat is fully dry, which is usually within 15 minutes at the most, clean up the paper backings from your decals, bowl of water, manicure supplies, and relax - embrace the beauty of fall.
Want to try this nail design?
Get the materials listed below:
Other Articles You May Enjoy:
This post contains affiliate links. As an Amazon Associate I earn from qualifying purchases. As an Ulta Affiliate, this site earns a commission through qualifying purchases.